Please update your USB with drivers, compatible with your operating system.
The Beast Gimbal
The Beast Gimbal
The most advanced digital 3-axis camera stabilizer.
Exceptionally light (only 6.5 lb).
Successfully tested to work with the best cameras.
Also designed to work with cranes and multirotor drones.
Perfect for Lock’n’Load.
Using a camera stabilizer has never been so easy!
 Limitless support
The Beast Gimbal Overview
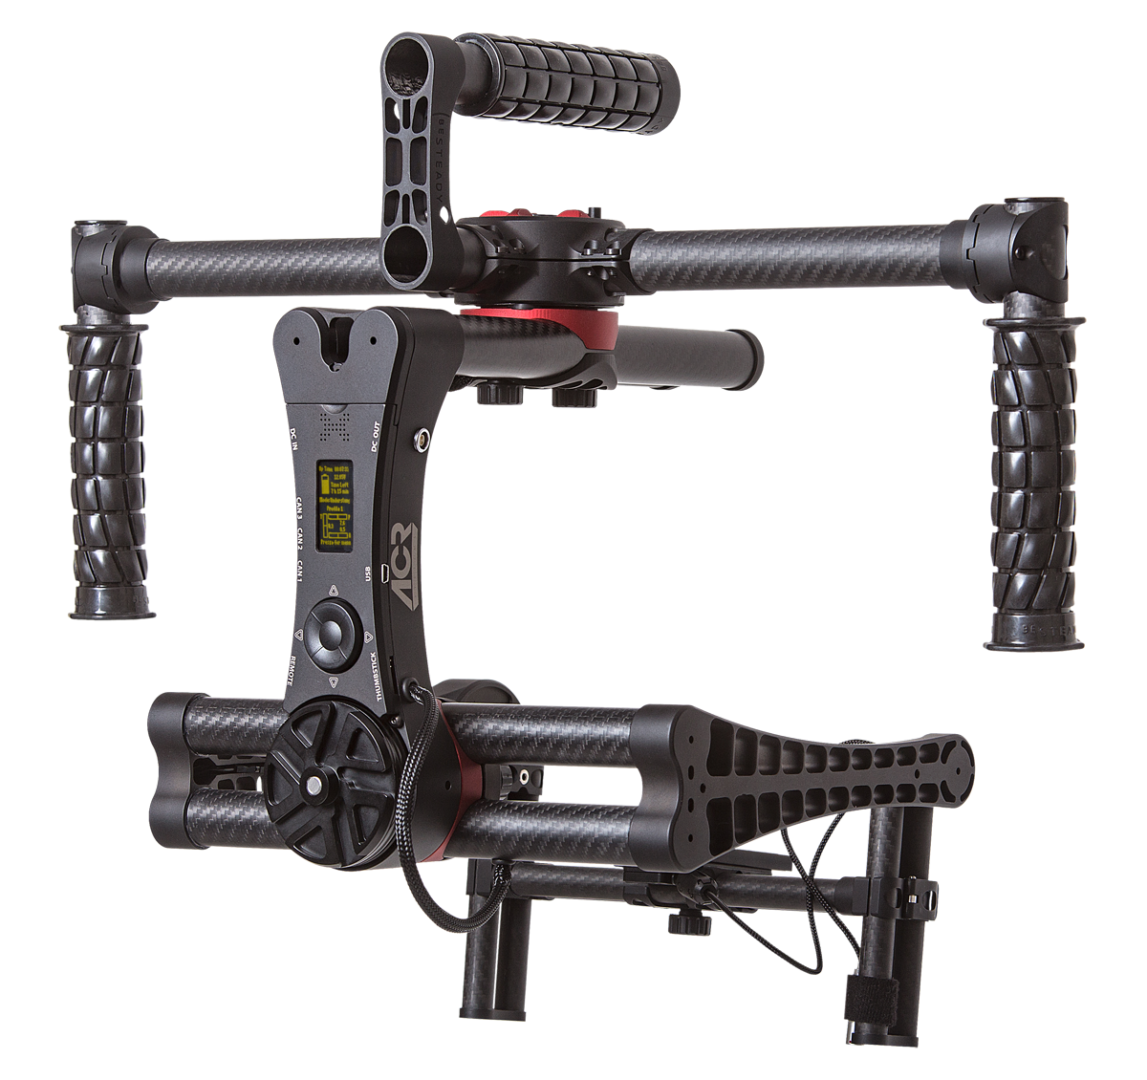
The Beast Gimbal is the most advanced digital 3-axis camera stabilizer. Brushless motors, several precise sensors and a sophisticated control firmware ensure the smoothest camera movements ever. Exceptionally light (only 6.5 lb) for maximum payload of 13.23 lb. Successfully tested to work with the best cameras, to name the few: RED Epic, RED Scarlett, Sony FS7 and F55, Canon C300 and C500. Settings are easy to customize thanks to it’s OLED screen and embedded speaker. Equipped with Follow Mode to ensure genuinely cinematic and really stable shots. Available with Thumbstick and Remote Control Units.
The Beast Gimbal is also designed to work with cranes and multirotor drones.
Using a stabilizer has never been so easy!
Product Highlights:
- Embedded LEMO power solution for medium cameras and accessories
- OLED screen
- Built-in Keyboard Control Panel
- Embedded Speaker
- High-precision encoders
- Exceptionally lightweight – only 6.5 lb (2,95 kg)
- Maximum payload of 13.23 lb (6 kg)
- Truly organic and Cinematic Follow Mode
- 2-year warranty
Gallery
-

French Open 2016 Men’s Final ITV Opener.
-

Freerunning in the Forest by Nico Jansky (with Waldemar ‘Waldi’ Müller.)
-

Community showcase 2015 – taken with ACR gimbals.
-

SWISS maintenance Cabin works by Lauschsicht. Shot on a Canon 5K MKIII with Magic Lantern.
-
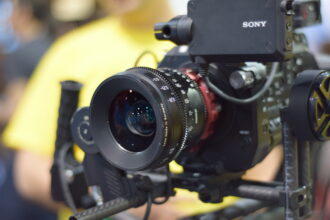
FS7 and The Beast Gimbal.
-

Short video material from NAB 2015.
-
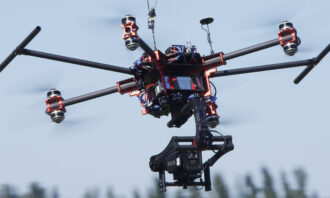
The Beast Gimbal flying with Monster X.
-
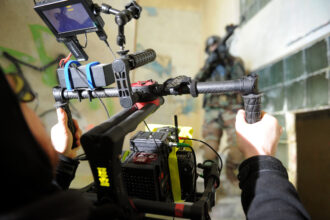
The Beast Gimbal while shooting action.
-
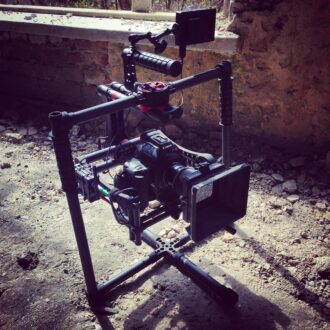
The Beast Gimbal rests after shooting in ruins.
-
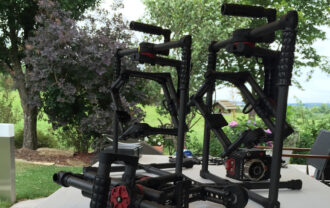
The Beast Gimbal “army”.
-
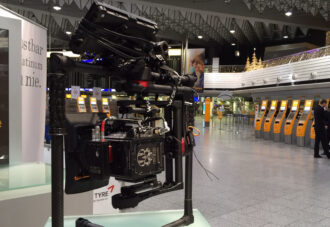
The Beast Gimbal waiting with RED on departure…
-
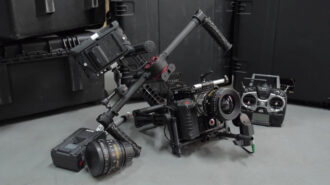
ACR gimbal.
-
![<p>The Beast Gimbal tutorial [1] – System Components.</p>](https://i.vimeocdn.com/video/513965405_640.jpg)
The Beast Gimbal tutorial [1] – System Components.
-
![<p>The Beast Gimbal tutorial [2] – Mounting Camera.</p>](https://i.vimeocdn.com/video/513965386_640.jpg)
The Beast Gimbal tutorial [2] – Mounting Camera.
-
![<p>The Beast Gimbal tutorial [3] – Balancing Tilt Axis.</p>](https://i.vimeocdn.com/video/513965380_640.jpg)
The Beast Gimbal tutorial [3] – Balancing Tilt Axis.
-
![<p>The Beast Gimbal tutorial [4] – Balancing Roll Axis.</p>](https://i.vimeocdn.com/video/513965377_640.jpg)
The Beast Gimbal tutorial [4] – Balancing Roll Axis.
-
![<p>The Beast Gimbal tutorial [5] – Balancing Pan Axis.</p>](https://i.vimeocdn.com/video/513965369_640.jpg)
The Beast Gimbal tutorial [5] – Balancing Pan Axis.
-
![<p>The Beast Gimbal tutorial [6] – Manager App Overview.</p>](https://i.vimeocdn.com/video/513965365_640.jpg)
The Beast Gimbal tutorial [6] – Manager App Overview.
-
![<p>The Beast Gimbal tutorial [7] – Onboard Manager Basic Functions.</p>](https://i.vimeocdn.com/video/514055230_640.jpg)
The Beast Gimbal tutorial [7] – Onboard Manager Basic Functions.
-
![<p>The Beast Gimbal tutorial [8] -Service Mode Boot-Up.</p>](https://i.vimeocdn.com/video/513965364_640.jpg)
The Beast Gimbal tutorial [8] -Service Mode Boot-Up.
-
![<p>The Beast Gimbal tutorial [9] -Initial Configuration & First Time Run.</p>](https://i.vimeocdn.com/video/513965321_640.jpg)
The Beast Gimbal tutorial [9] -Initial Configuration & First Time Run.
-
![<p>The Beast Gimbal tutorial [10] -Xtended Stabilization.</p>](https://i.vimeocdn.com/video/513965243_640.jpg)
The Beast Gimbal tutorial [10] -Xtended Stabilization.
-
![<p>The Beast Gimbal tutorial [11] – Follow Mode.</p>](https://i.vimeocdn.com/video/514054241_640.jpg)
The Beast Gimbal tutorial [11] – Follow Mode.
-
![<p>The Beast Gimbal tutorial [12] -Advanced Features. Remote Control.</p>](https://i.vimeocdn.com/video/513965232_640.jpg)
The Beast Gimbal tutorial [12] -Advanced Features. Remote Control.
-
![<p>The Beast Gimbal tutorial [13] – Advanced Features. Graupner MZ-12.</p>](https://i.vimeocdn.com/video/513965225_640.jpg)
The Beast Gimbal tutorial [13] – Advanced Features. Graupner MZ-12.
-
![<p>The Beast Gimbal tutorial [14] – Advanced Features. Real Inverted Mode.</p>](https://i.vimeocdn.com/video/513965189_640.jpg)
The Beast Gimbal tutorial [14] – Advanced Features. Real Inverted Mode.
-
![<p>The Beast Gimbal tutorial [15] – Advanced Features. Working with Profiles.</p>](https://i.vimeocdn.com/video/513965166_640.jpg)
The Beast Gimbal tutorial [15] – Advanced Features. Working with Profiles.
-

Rider gimbal by Movimento France.
Specification
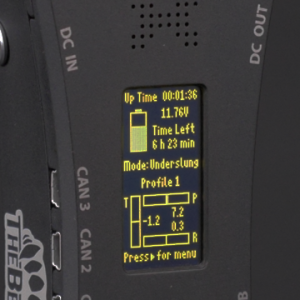
One of The Beast Gimbal greatest feature is its OLED screen and control panel, connected with the unique OnBoard Manager software. This allows full configuration without any kind of external input. The Beast can tell you about current configuration, running profile, battery status and many other things with its own voice – it is a talking gimbal (but can be muted, if needed)! The OLED screen is clearly visible even in bright sunlight. The “magic” of The Beast resides here – you have full control over this amazing piece of engineering, just using this small screen and keyboard. You have direct access to every important function either during the preparation process or live shots – it takes seconds to set! This feature make you completely free from using either computers or tablets to set the gear up. It is plug’n’play – a new standard!
The Beast Gimbal is powered from standard, small Li-Ion batteries or large Li-Po battery. The Beast itself can work on small batteries alone for more then 12 hours. The Intelligent Charger with built-in balancer allows to charge both types of batteries with correct settings. Thanks to two auxiliary power LEMO outputs also external accessories can be powered up straight from the main power source, including wireless follow focus systems, wireless video transmission and the camera itself. Using large battery you can power up even the RED Epic along with accessories.
Devices
Three motors are responsible for the rotation of The Beast Gimbal. Each motor includes an angle encoder – a sensor that allows counting each axis angle rotation in real time, to the nearest of hundredths of a degree.
In combination with the other two 3-axial gyroscopic sensors and accelerometers, it monitors and maintains the horizon leveled. Twin powerful Cortex cpu process data and along with advanced coding, turn your “shaking” running into clear shot.
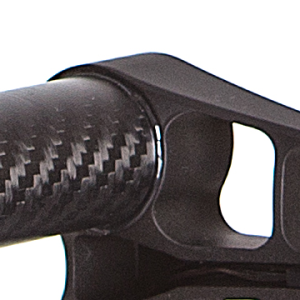
The motors, custom-built for The Beast, match the requirements of maximum power and exceptionally smooth transitions between angled camera positions. Solid and compact construction, thanks to the usage of various aluminum alloys, inter alia, rigid 7075 aluminum (most lightweight aircraft aluminum), carbon fiber, and special type of finishing – anodization – provides a matt look and no glare when shooting.
The hybrid technology ensures your production to be genuinely cinematic and truly stable. So run, jump or travel as quickly as you want with your The Beast!
Electronics
The Beast Gimbal usage it the simplest possible. You do not have to deal with strange parameters of PIDs. Our solution has only three power sliders. That’s it! It is even more simple when introducing the special algorithms to setup the power in the Autotune procedure. Using a stabilizer has never been so easy!
Operating Modes
The unique Follow Mode allows you on smooth and truly cinematic shots based on natural movement control system.
Unique way to control The Beast Gimbal by second operator is to use ACR The Link, RC receiver and transmitter modules, that allow you to move the camera intuitively in real-time with your body movements. You can pair one of The Links with any piece of gear you can think of and control the other Link attached to your stabilizer – possibilities are endless!
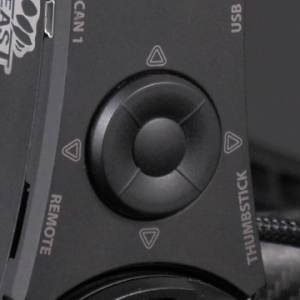
Dedicated Thumbstick or external remote control devices enable you full control of your camera position.
The basic operating mode, Xtended Stabilization, keeps your camera in defined position, regardless of the gimbal emplacement. This is usually used with remote movement control on multirotor drones, cranes, JIBs. When you want the stabilizer follow your movements, switch to the smooth Follow Mode. It can be configure out to have needed delays and remove unwanted jitters and tilts when filming in real time. This function can be toggled on for all three axis separately.
Each of the movement control options can be used in global mode called Inverted Mode. In this mode The Beast is working upside down and the camera is above the handheld module. That allows natural, eye-level shooting without using too much strength from the camera operator. In this mode, the built-in camera feedback screens is also used, instead of external ones. The Inverted Mode is also adapted when The Beast attached to RC cars, JIBs and other platforms.
Working with The Beast
Handheld operation
The classic use of The Beast is within operators hands. Various gear setups allow the use of several advanced functions thanks to implementing remote control devices or joysticks.
Multirotor drones
After removing the top handheld module the device becomes a classic gimbal – a stabilizer dedicated to be used with copters. Using the Xtended Stabilization along with remote control input you can achieve amazing results!
JIB, RC cars, other platforms
The versatility of what can be done with The Beast surprised even us – the creators. The Beast in handheld state, handled over JIB arm, stabilizer on a performance RC car, stabilizer on a paraglider, on a boar, in the air, in a car, on a rope, under an EasyRig weight support system. The creativity of ACR The Beast users has no limits!
Compatibility
The Beast was successfully tested to work with the following cameras:
- ARRI ALEXA Mini
- RED Weapon
- RED Epic
- RED Scarlet
- Sony FS700
- Sony FS7
- Sony FS5
- Sony F5
- Sony F55
- Ursa Mini 4.6
- Canon C100
- Canon C300
- Canon 5D
- Panasonic GH4
- Blackmagic Production Camera 4K
Most important features
- The most advanced digital stabilizer on the market
- High-resolution, built-on encoders
- Exceptionally lightweight construction – weights only 6.5 lb (2,95 kg)!
- Maximum payload of 13.23 lb (6 kg)
- Embedded speaker and OLED screen
- Built-in keyboard control panel for quick and easy configuration via OnBoard Manager
- The ability to provide up to 5A/12V of auxiliary power from the vertical arm and camera tray outputs to power up external accessories
- Incredible precision of stabilization
- Made of aircraft grade duralumin alloy and carbon
- Advanced, hybrid electronics (gyroscopic sensors, accelerometers and encoders)
- Intuitive and powerful ACR Manager software
- Versatility of the working modes: Xtended Stabilization, Follow Mode, Inverted Mode
- Completely tool-less camera balancing system
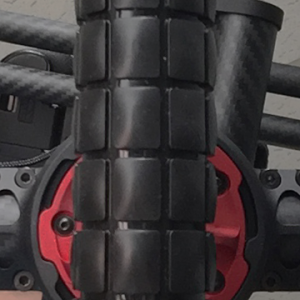
- Highly comfortable triple grip handlebar – the Handheld Module
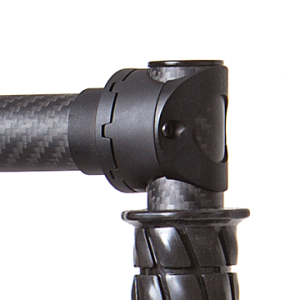
- Rotatable, 8-position side handles
- Ability to quickly detach the Handheld Module
- Original, in-house project concept
- Thumbstick, Remote Control Units & The Link available
- 2-year limited warranty (sign of 2-year warranty)
- Proudly made in Europe
Technical data
Size
Handheld width: 19.84 inches / 540 mm
Camera shelf size
Width: 8 inches / 204 mm
Height (from tilt axis): 3.93 inches /100 mm
Fork depth (from tilt axis): 7.48 inches / 190 mm
Weight
Complete unit: 6.5 lb / 2,95 kg
Without Handheld Module: 5.29 / lb 2,4 kg
Battery runtime
Twin small batteries: up to 13 hours, depending on payload
Single large battery: up to 16 hours, depending on payload
Maximum payload: 13.23 lb / 6 kg
Use The Beast with The Link for wireless control. Learn more.
Downloads
Manuals
Tutorials
-
![<p>The Beast Gimbal tutorial [1] – System Components.</p>](https://i.vimeocdn.com/video/513965405_640.jpg)
The Beast Gimbal tutorial [1] – System Components.
-
![<p>The Beast Gimbal tutorial [2] – Mounting Camera.</p>](https://i.vimeocdn.com/video/513965386_640.jpg)
The Beast Gimbal tutorial [2] – Mounting Camera.
-
![<p>The Beast Gimbal tutorial [3] – Balancing Tilt Axis.</p>](https://i.vimeocdn.com/video/513965380_640.jpg)
The Beast Gimbal tutorial [3] – Balancing Tilt Axis.
-
![<p>The Beast Gimbal tutorial [4] – Balancing Roll Axis.</p>](https://i.vimeocdn.com/video/513965377_640.jpg)
The Beast Gimbal tutorial [4] – Balancing Roll Axis.
-
![<p>The Beast Gimbal tutorial [5] – Balancing Pan Axis.</p>](https://i.vimeocdn.com/video/513965369_640.jpg)
The Beast Gimbal tutorial [5] – Balancing Pan Axis.
-
![<p>The Beast Gimbal tutorial [6] – Manager App Overview.</p>](https://i.vimeocdn.com/video/513965365_640.jpg)
The Beast Gimbal tutorial [6] – Manager App Overview.
-
![<p>The Beast Gimbal tutorial [7] – Onboard Manager Basic Functions.</p>](https://i.vimeocdn.com/video/514055230_640.jpg)
The Beast Gimbal tutorial [7] – Onboard Manager Basic Functions.
-
![<p>The Beast Gimbal tutorial [8] -Service Mode Boot-Up.</p>](https://i.vimeocdn.com/video/513965364_640.jpg)
The Beast Gimbal tutorial [8] -Service Mode Boot-Up.
-
![<p>The Beast Gimbal tutorial [9] -Initial Configuration & First Time Run.</p>](https://i.vimeocdn.com/video/513965321_640.jpg)
The Beast Gimbal tutorial [9] -Initial Configuration & First Time Run.
-
![<p>The Beast Gimbal tutorial [10] -Xtended Stabilization.</p>](https://i.vimeocdn.com/video/513965243_640.jpg)
The Beast Gimbal tutorial [10] -Xtended Stabilization.
-
![<p>The Beast Gimbal tutorial [11] – Follow Mode.</p>](https://i.vimeocdn.com/video/514054241_640.jpg)
The Beast Gimbal tutorial [11] – Follow Mode.
-
![<p>The Beast Gimbal tutorial [12] -Advanced Features. Remote Control.</p>](https://i.vimeocdn.com/video/513965232_640.jpg)
The Beast Gimbal tutorial [12] -Advanced Features. Remote Control.
-
![<p>The Beast Gimbal tutorial [13] – Advanced Features. Graupner MZ-12.</p>](https://i.vimeocdn.com/video/513965225_640.jpg)
The Beast Gimbal tutorial [13] – Advanced Features. Graupner MZ-12.
-
![<p>The Beast Gimbal tutorial [14] – Advanced Features. Real Inverted Mode.</p>](https://i.vimeocdn.com/video/513965189_640.jpg)
The Beast Gimbal tutorial [14] – Advanced Features. Real Inverted Mode.
-
![<p>The Beast Gimbal tutorial [15] – Advanced Features. Working with Profiles.</p>](https://i.vimeocdn.com/video/513965166_640.jpg)
The Beast Gimbal tutorial [15] – Advanced Features. Working with Profiles.
Software
FAQ
-
ACR Manager doesn't connect to ACR The Plus.
-
How can I easily find out which version (V1 or V2) of The Beast I have?
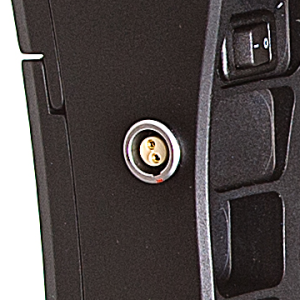
The Beast V2 has LEMO connectors at DC IN, DC OUT and camera shelf power source. The Beast V1 does not have those.
-
How can I check The Beast firmware version?
While The Beast is powered, you can check that in DETAILS -> Details Screeen.
-
What is the best setting for micro vibrations?
For micro vibrations you should have higher filter. Although we recommend to check balance and motor strength. It is good practice to adjust motor strength and then set filter as low as possible.
-
Can I connect large battery while there are small batteries connected to The Beast?
No, you can't. The Beast can be powered by only one power source at the time regardless it's large battery, small batteries or Vlock battery. If you connect two source of power to The Beast you will damage both gimbal and batteries.
-
Why is my gimbal about 30 degrees off the center after startup?
Please check Lock and Load connector position. When you mount handheld be sure that LnL connector is pointing east and when you finish it is pointing north-east.
-
The Beast is moving erratically on every axis after its startup.
Before you power up The Beast check if tilt motor is on the left side of the gimbal.
-
I have mounted my camera on The Beast gimbal and it has weird vibrations. How can I stop it?
Vibrations might be caused by wrong balancing and motors strength. Please check your camera balance. When you will be sure that it's properly balanced start Autotune procedure after which The Beast will set suitable motor strength for your current setup. With some setups you might need to manually adjust motor strength after Autotune.

